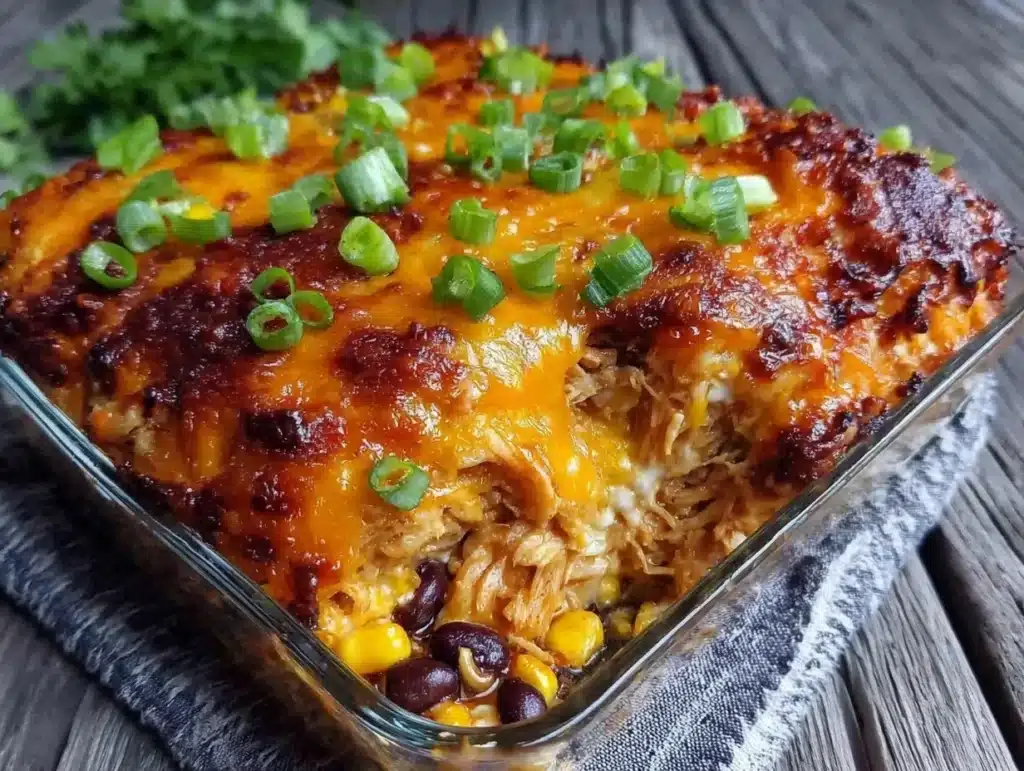
Let’s face it: life gets busy. You know that feeling when you come home from a long day, exhausted, and the last thing you want to do is stand over a hot stove chopping onions? I’ve been there more times than I care to admit. This creamy chicken burrito bake was born out of pure desperation during a particularly hectic season of my life. I was working late, the kids were running around, and I needed something that tasted like a cheat meal but actually kept me full and energized.
I started tossing ingredients into a 9×13 baking dish, half-expecting it to turn into a dry, flavorless disaster. But honestly? It was magic. The tortillas soaked up that rich, cheesy sauce, the chicken stayed tender, and the whole thing smelled like a Mexican restaurant by the time it hit the oven. It became my go-to weeknight savior. And the best part? It’s perfect for meal prep. You can make a big batch on Sunday, and suddenly, lunch and dinner decisions are handled for you all week long.
If you’re looking for a recipe that delivers big flavors without the fuss, this creamy chicken burrito bake is it. It’s comforting, hearty, and surprisingly easy to customize. I’ve tested this recipe so many times that I can practically make it in my sleep. Whether you’re a busy parent, a working professional, or just someone who loves good food, this dish is going to become a staple in your rotation. Let’s get cooking.
Why You’ll Love This Recipe
There are a hundred chicken recipes out there, but this one stands out for reasons that go beyond just taste. After making this over a dozen times, I’ve realized why it has such a loyal following in my kitchen. It hits that sweet spot between healthy eating and pure comfort food. Here is why this creamy chicken burrito bake deserves a spot on your menu:
- Quick & Easy: You spend about 15 minutes prepping and 30 minutes baking. That’s it. No complex techniques or hours of simmering. It’s perfect for those nights when you want a homemade meal but don’t have the energy for a gourmet project.
- Simple Ingredients: You likely have most of this in your fridge or pantry right now. Chicken breasts, tortillas, cheese, salsa, and cream cheese are pretty standard staples. No need for a special grocery run.
- Meal Prep Hero: This recipe scales beautifully. It stores well in the fridge for up to four days and freezes beautifully for up to three months. It’s the ultimate make-ahead dinner that tastes just as good reheated.
- Crowd-Pleaser: Even the pickiest eaters in my house devour this. The creamy texture masks any strong flavors that kids might dislike, while the spices satisfy adult palates. It’s a win-win.
- Unbelievably Delicious: The combination of soft, sauce-soaked tortillas and gooey, melted cheese is next-level comfort food. It’s the kind of meal that makes you close your eyes after the first bite and just sigh with satisfaction.
What makes this different from other casseroles is the balance. It’s not just dry chicken and rice. The cream cheese and salsa create a luxurious sauce that keeps everything moist. It’s hearty enough to keep you full for hours, yet light enough that you won’t feel sluggish afterward. It’s comfort food reimagined for modern life—fast, flavorful, and forgiving.
What Ingredients You Will Need
This recipe relies on wholesome, accessible ingredients to deliver bold flavor and a satisfying texture. You don’t need anything fancy, but the quality of a few key items does make a difference. Here is what you’ll need to gather:
- Chicken Breasts: 1.5 lbs of boneless, skinless chicken breasts. I prefer buying fresh chicken and freezing it myself, but pre-cut strips work if you’re in a rush. Look for plump, pink meat with no odd smells.
- Tortillas: 8-10 flour tortillas. Medium size works best. Flour tortillas are softer and hold the sauce better than corn tortillas for this bake. Brands like Mission or La Tortilla Factory are reliable staples in my pantry.
- Cream Cheese: 8 oz of softened cream cheese. This is the secret to the creamy texture. Don’t skip it or try to substitute with something low-fat; you need that richness. Room temperature cream cheese blends easier.
- Salsa: 1.5 cups of your favorite salsa. Mild, medium, or hot—whatever you prefer. I like using a chunky salsa because it adds nice texture. Look for brands with simple ingredients, like Pace or homemade if you’re feeling ambitious.
- Shredded Cheese: 2 cups of Mexican blend or cheddar cheese. A mix of cheeses gives a better flavor profile. I often use a blend of cheddar for sharpness and Monterey Jack for meltiness.
- Black Beans: 1 can (15 oz) of black beans, rinsed and drained. These add protein and fiber. Rinsing them well prevents the dish from becoming too watery.
- Corn: 1 cup of corn kernels. Fresh, frozen, or canned all work. Frozen corn is often sweeter and easier to find year-round.
- Chicken Broth: 1 cup of low-sodium chicken broth. This helps create the sauce consistency without making it too salty.
- Spices: 1 teaspoon each of cumin, chili powder, and smoked paprika. These spices build the foundational flavor. Smoked paprika adds a nice depth that mimics slow-cooked meats.
- Optional Toppings: Sour cream, cilantro, diced avocado, or jalapeños. These are for serving, but they elevate the final dish significantly.
If you need substitutions, you can use turkey breast instead of chicken, or swap the black beans for pinto beans. For a gluten-free option, just ensure your tortillas and broth are certified gluten-free. The beauty of this recipe is its flexibility.
Equipment Needed
You don’t need a fancy kitchen to make this bake. A few basic tools will get the job done. Here is what you’ll need:
- 9×13 Inch Baking Dish: This is the standard size for casseroles. Glass or ceramic dishes work well because they distribute heat evenly. If you only have a 9×9 dish, the bake will be thicker and might need a few extra minutes in the oven.
- Large Skillet: You’ll need this to brown the chicken and sauté the spices. A non-stick skillet is easiest for cleanup.
- Mixing Bowls: Two medium bowls are helpful. One for mixing the cream cheese and salsa, and another for holding the shredded cheese.
- Wooden Spoon or Spatula: For stirring the chicken and assembling the layers. A sturdy spatula is great for spreading the sauce.
- Measuring Cups and Spoons: Precision helps, especially with the spices. Too much cumin can overpower the dish.
I’ve used everything from cheap non-stick pans to high-end stainless steel, and for this recipe, a simple non-stick skillet is my go-to. It makes cleaning up the browned chicken bits much easier. If your baking dish is scratched or worn, it’s fine—this sauce hides all imperfections. Keep your utensils handy and you’ll be done in no time.
Preparation Method
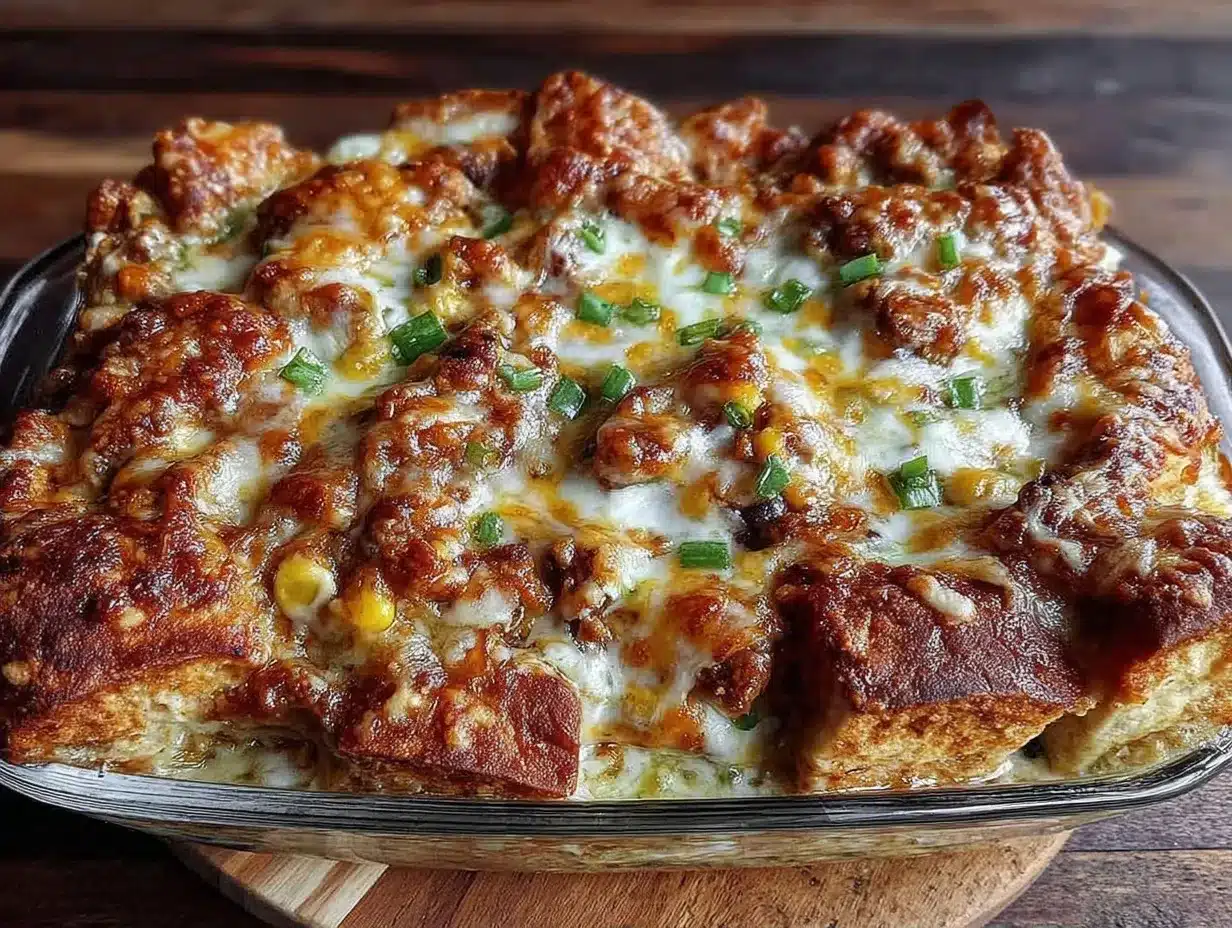
Let’s walk through the steps to make this creamy chicken burrito bake. It’s straightforward, but there are a few tricks to get it just right.
- Preheat and Prep: Start by preheating your oven to 375°F (190°C). Grease your 9×13 baking dish with cooking spray or a little olive oil. This prevents sticking and makes cleanup easier.
- Cook the Chicken: Heat a large skillet over medium-high heat. Add a little oil, then add the diced chicken breasts. Season with salt and pepper. Cook for 5-7 minutes, stirring occasionally, until the chicken is browned and cooked through. Remove from heat and set aside.
- Make the Sauce: In a mixing bowl, combine the softened cream cheese, salsa, and chicken broth. Whisk until smooth and creamy. If the cream cheese is still too thick, microwave it for 10-15 seconds to help it blend. Stir in the cumin, chili powder, and smoked paprika.
- Layer the Base: Spread half of the sauce mixture on the bottom of the prepared baking dish. This creates a moisture barrier so the tortillas don’t burn.
- First Tortilla Layer: Lay 4-5 tortillas over the sauce. You can tear them to fit if needed. Don’t worry about perfect alignment; rustic looks better here.
- Add Fillings: Sprinkle half of the cooked chicken, half of the black beans, and half of the corn over the tortillas. Then, sprinkle half of the shredded cheese on top.
- Repeat Layers: Add the remaining tortillas, followed by the rest of the chicken, beans, and corn. Pour the remaining sauce over the top, making sure to get it into the nooks and crannies.
- Top with Cheese: Sprinkle the remaining shredded cheese evenly over the top. This creates that golden, bubbly crust we all love.
- Bake: Cover the dish with foil and bake for 20 minutes. Then, remove the foil and bake for another 10-15 minutes, or until the cheese is melted and bubbly and the edges are slightly crispy.
- Rest and Serve: Let the bake rest for 5-10 minutes before cutting. This helps it set and makes it easier to serve. Garnish with fresh cilantro or avocado if desired.
Pay attention to the cheese as it browns. You want it golden, not burnt. If it starts to darken too quickly, tent it loosely with foil. The resting step is crucial; if you cut it immediately, it might fall apart. Give it a moment to settle.
Cooking Tips & Techniques
Over time, I’ve learned a few things that make this recipe turn out perfectly every time. First, don’t skip the browning of the chicken. Raw chicken mixed directly into the sauce can result in a gray, boiled texture. Searing it first adds flavor and ensures it’s cooked through.
Second, soften your cream cheese. Cold cream cheese creates lumps in the sauce. If you forget to take it out of the fridge earlier, just microwave it in short bursts. It needs to be pliable to mix smoothly with the salsa.
Another common mistake is over-salting. Salsa, broth, and cheese all contain sodium. Taste your sauce before adding extra salt. Usually, the natural saltiness is enough. If you prefer a lower-sodium version, use low-sodium salsa and broth, and go easy on the cheese.
For efficiency, chop your chicken while the oven preheats. Multitasking is key in weeknight cooking. Have all your ingredients measured and ready before you start cooking the chicken. This “mise en place” approach keeps you calm and organized.
If you like a crunchier top, you can sprinkle some crushed tortilla chips over the cheese before baking. It adds a nice textural contrast to the soft layers. I also recommend using a sharp knife to cut the bake. A dull knife will squish the layers. Let it cool slightly, then slice into squares.
Variations & Adaptations
One of the best things about this bake is how easy it is to tweak. Here are a few variations I’ve tried with great success:
- Spicy Kick: Add a diced jalapeño to the chicken while it cooks, or use a hot salsa. You can also stir in some chopped green chiles for a classic green chile chicken flavor.
- Vegetarian Option: Swap the chicken for extra beans or roasted cauliflower. Cauliflower absorbs the sauce beautifully and adds a nice bite. Use vegetable broth instead of chicken broth.
- Low-Carb: Use low-carb tortillas or skip them entirely for a deconstructed bake. Just layer the chicken, beans, corn, and sauce in the dish and top with cheese. It’s basically a chicken casserole.
- Slow Cooker Version: You can make this in a slow cooker. Layer everything in the crockpot, cook on low for 4 hours, and top with cheese for the last 30 minutes. It’s even more hands-off.
- Taco Style: Add some diced tomatoes and green onions to the filling. Serve with a side of guacamole for a taco-night vibe.
I once tried adding sweet potatoes to this bake, and it was surprisingly delicious. The sweetness balanced the savory spices well. It’s a great way to use up leftover roasted veggies. Don’t be afraid to experiment with what’s in your fridge.
Serving & Storage Suggestions
This bake is best served warm, right out of the oven. It pairs well with a simple green salad or some roasted vegetables. A dollop of sour cream and fresh cilantro adds a nice freshness that cuts through the richness. I also like to serve it with a side of black bean soup for a complete meal.
For storage, let the bake cool to room temperature, then cover tightly with plastic wrap or transfer to an airtight container. It will last in the refrigerator for up to 4 days. The flavors actually meld together over time, so it might taste even better on day two.
To freeze, wrap individual portions in foil or place them in freezer-safe containers. They will keep for up to 3 months. Thaw in the fridge overnight and reheat in the microwave or oven. If reheating in the oven, cover with foil to prevent the cheese from drying out.
When reheating, the texture might change slightly. The tortillas will absorb more sauce, becoming softer. If you prefer a crispier texture, broil the top for a minute before serving. It’s a small step that makes a big difference.
Nutritional Information & Benefits
While this is a comfort food, it’s also packed with protein and fiber. The chicken provides lean protein, which helps with muscle repair and satiety. The black beans and corn add fiber, which supports digestion and keeps you full longer. The cheese adds calcium and healthy fats.
Each serving contains approximately 450-500 calories, depending on the specific brands and amounts used. It’s a balanced meal that can fit into most dietary plans. For those watching sodium, use low-sodium ingredients and control the amount of cheese. It’s not a diet food, but it’s certainly not a cheat meal in the traditional sense. It’s nourishing and satisfying.
I appreciate that this recipe allows me to control the ingredients. I know exactly what’s going into my body, unlike takeout. It’s a practical way to enjoy flavorful food without compromising on health. Plus, the meal prep aspect helps me stay on track with my nutrition goals throughout the week.
Conclusion
This creamy chicken burrito bake is more than just a recipe; it’s a solution to the daily struggle of “what’s for dinner?” It’s easy, delicious, and perfect for making ahead. I hope you give it a try and see why it has become a favorite in my home. Feel free to customize it to suit your taste. Add more veggies, spice it up, or keep it simple.
I’d love to hear how it turns out for you. Leave a comment below with your variations or tips. Share your photos on social media and tag me—I love seeing your creations. Cooking should be fun and stress-free, and this recipe helps make that a reality. Happy cooking!
Frequently Asked Questions
Can I use rotisserie chicken for this recipe?
Absolutely! Using rotisserie chicken is a great time-saver. Just shred it and add it to the layers. You can skip the browning step entirely, which cuts down prep time even further.
How do I prevent the tortillas from getting soggy?
The key is the sauce ratio. Make sure you have enough sauce to moisten the tortillas, but not so much that they drown. Also, letting the bake rest for 10 minutes after baking allows the tortillas to absorb the sauce properly without becoming mushy.
Can I freeze the entire dish?
Yes, you can freeze the unbaked casserole. Wrap it tightly in plastic and foil, and freeze for up to 3 months. Thaw in the fridge overnight before baking. You may need to add a few extra minutes to the baking time since it’s starting cold.
What cheese melts best for this bake?
Mexican blend cheeses are great because they melt evenly. Monterey Jack and Cheddar are also excellent choices. Avoid pre-shredded cheese if possible, as it contains anti-caking agents that can prevent smooth melting. Shred your own cheese for the best results.
Is this recipe gluten-free?
It can be. Simply use gluten-free tortillas and ensure your salsa and broth are certified gluten-free. Most other ingredients are naturally gluten-free, but always check labels for hidden gluten in processed items.
Pin This Recipe!


Creamy Chicken Burrito Bake: Easy Meal Prep Recipe
- Total Time: 45 minutes
- Yield: 6 servings 1x
Description
A comforting and hearty weeknight dinner that combines tender chicken, tortillas, and a rich cheesy sauce. This easy-to-make bake is perfect for meal prep, storing well in the fridge for up to four days or freezing for up to three months.
Ingredients
- 1.5 lbs boneless, skinless chicken breasts, diced
- 8–10 flour tortillas (medium size)
- 8 oz softened cream cheese
- 1.5 cups salsa (mild, medium, or hot)
- 2 cups shredded Mexican blend or cheddar cheese
- 1 can (15 oz) black beans, rinsed and drained
- 1 cup corn kernels
- 1 cup low-sodium chicken broth
- 1 teaspoon cumin
- 1 teaspoon chili powder
- 1 teaspoon smoked paprika
- Salt and pepper to taste
- Cooking spray or olive oil for greasing
Instructions
- Preheat oven to 375°F (190°C) and grease a 9×13 inch baking dish.
- Heat a large skillet over medium-high heat with a little oil. Add diced chicken, season with salt and pepper, and cook for 5-7 minutes until browned and cooked through. Set aside.
- In a mixing bowl, whisk together softened cream cheese, salsa, and chicken broth until smooth. Stir in cumin, chili powder, and smoked paprika.
- Spread half of the sauce mixture on the bottom of the prepared baking dish.
- Lay 4-5 tortillas over the sauce, tearing them to fit if necessary.
- Sprinkle half of the cooked chicken, half of the black beans, half of the corn, and half of the shredded cheese over the tortillas.
- Add the remaining tortillas, followed by the rest of the chicken, beans, and corn.
- Pour the remaining sauce over the top, ensuring it reaches the nooks and crannies.
- Sprinkle the remaining shredded cheese evenly over the top.
- Cover the dish with foil and bake for 20 minutes.
- Remove foil and bake for another 10-15 minutes until cheese is melted, bubbly, and edges are slightly crispy.
- Let the bake rest for 5-10 minutes before cutting and serving.
Notes
For best results, ensure the cream cheese is softened to avoid lumps. Let the bake rest for 10 minutes after baking to allow it to set. If you prefer a crunchier top, sprinkle crushed tortilla chips over the cheese before baking. This recipe can be made gluten-free by using certified gluten-free tortillas and broth.
- Prep Time: 15 minutes
- Cook Time: 30 minutes
- Category: Main Course
- Cuisine: Mexican
Nutrition
- Serving Size: 1 square slice
- Calories: 475
- Sugar: 4
- Sodium: 680
- Fat: 22
- Saturated Fat: 10
- Carbohydrates: 35
- Fiber: 6
- Protein: 32
Keywords: chicken burrito bake, meal prep, easy dinner, creamy chicken, casserole, weeknight meals, comfort food